


Recording your PowerPoint presentation can be a great way to create engaging, sharable content. With audio and video capabilities, you can add narration, on-screen demonstrations, and more. In this comprehensive guide, we’ll explore the ins and outs of recording a professional presentation.
Choosing a Recording Tool
The first step is selecting software to record your presentation. There are a few main options to consider:
PowerPoint’s Built-In Recorder
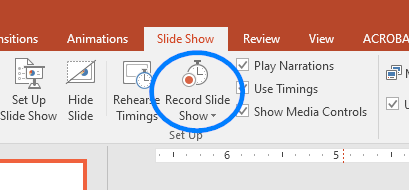
PowerPoint has a simple recording feature built right in. To access it, go to the Slide Show tab and click on the “Record Slide Show” button. This will let you record audio and video as you click through your slides.
The PowerPoint recorder is quick and easy to use. However, it has limited editing capabilities. Once your recording is complete, you can only export it as a video file.
Recording Presentations with Screen Story
Screen Story is a Mac screen recording app that can be a helpful tool for capturing and producing presentation videos.
Some key features include:
- Automatic cursor animations - Screen Story applies physics and movement to your cursor, making it smooth and natural.
- Auto zoom - It can detect clicks and zoom in on relevant areas as you present.
- Customizable backgrounds - Change the virtual environment to match your brand.
- Flexible exporting - Export in formats like GIF, MP4, 4K, etc.
- Picture-in-picture - Record your webcam feed simultaneously.
Screen Story streamlines creating professional, polished presentation videos. The automatic enhancements save editing time while still offering plenty of customization options.
Consider using Screen Story if you want to:
- Quickly produce video content without intensive post-production
- Make software demos, product explainers, or tutorials
- Boost presentation engagement with animated cursor and smart zooming
- Display your presentation in a branded environment
- Easily export videos tailored for different platforms and needs
For presentations that demand more granular editing control, a tool like Camtasia or ScreenFlow may be preferable. But Screen Story delivers professional results with speed and simplicity.
{{blog-ad}}
Recording Your Narration
Once you’ve chosen your recording software, it’s time to record your narration. Here are some tips:
Write a Script
Having a script helps ensure your narration flows logically and hits all the key points. Read your script aloud a few times to practice delivery.
Set Up Your Recording Space
Find a quiet room without background noise. Position your microphone close to your mouth, but not so close it picks up pops and breathing sounds.
Record Small Sections at a Time
Don’t try to record your full presentation in one take. Break it into sections of 3-5 slides. This makes it easier to edit out mistakes without having to re-record everything.
Edit Out Mistakes
Don’t worry about getting a perfect take! Edit out any flubs or interruptions so your final video sounds polished.
Listen Back with a Critical Ear
After recording, play back your audio. Make sure the volume is consistent and the narration is clear and easy to understand. Re-record any parts that need improvement.
Capturing Your Screen and Camera
In addition to narration, you’ll want to record the visual components of your presentation:
Screen Recording
Your recording software will capture your slideshow, mouse movements, on-screen annotations, and any other on-screen activity.
Set your resolution to 720p or 1080p for sharp, high-quality video. Frame rate of 30 fps is ideal.
Webcam Recording
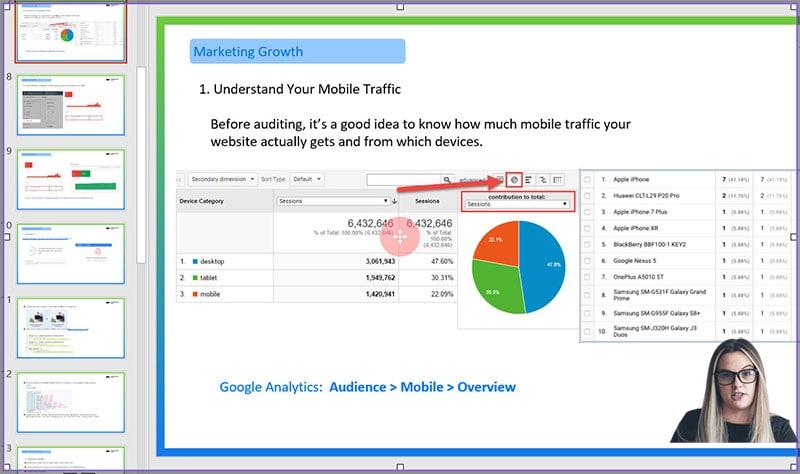
If you want to appear on-camera, record your webcam feed simultaneously. Picture-in-picture is a great way to present slides and be on screen.
Frame your shot tightly on your shoulders and head. Make sure the background is professional looking.
On-Screen Demonstrations
Consider adding over-the-shoulder style footage demonstrating something relevant to your presentation, like a software tutorial. This engages viewers by breaking up slides with more dynamic visuals.
Producing a Polished Video
With your raw footage captured, it’s time for post-production. Here are some tips for a professional edit:
Use Transitions Between Slides
Add subtle transitions like fades or wipes between slides. This creates better flow compared to abruptly jumping from slide to slide.
Incorporate B-Roll
B-roll refers to supplemental footage used to illustrate or enhance the narrative. For example, overlaying images of something you’re discussing. Used judiciously, b-roll boosts engagement.
Add Graphics and Text
Consider adding lower thirds, titles, captions, or highlighted callouts using your video editor. These graphics help convey information visually.
Color Correct and Brighten
If needed, use color correction tools to get smooth, natural lighting. You can also brighten dark footage. Just be careful not to overdo it.
Balance Audio Levels
Make sure audio stays consistent. Apply compression and normalization so the volume doesn’t get too loud or quiet at points.
Add Intro and Outro
Bookend your video with a nice introSlide and conclusionSlide. This gives it a complete, professional feel.
Sharing Your Presentation
Once your video is complete, it’s time to share it! Some options include:
- Uploading to YouTube or Vimeo
- Embedding on a website or blog
- Attaching to an email or LinkedIn post
Promote your video on social media or at conferences and events. Analytics show who’s viewing so you can see the impact.
Consider repurposing your presentation into additional formats like a podcast or microvideos on Instagram or TikTok.
Conclusion
Recording presentations creates shareable content that expands your reach beyond live sessions. With the techniques covered in this guide, you can make compelling videos that engage viewers and effectively communicate your message.
The key steps include:
- Using dedicated screen recording software
- Writing a script and rehearsing your narration
- Capturing high-quality camera and on-screen footage
- Using transitions, graphics, color correction, and other post-production to polish your video
- Sharing the final presentation through online channels and social media
The most important thing is creating content that informs, educates, entertains, or inspires your audience. With strategic planning and execution, your recorded presentations can accomplish exactly that.
FAQs
What is the best software for recording PowerPoint presentations?
For basic recording, PowerPoint has a built-in recorder you can use. For more advanced editing features, Camtasia and ScreenFlow are excellent options. Screen Story is also useful for quick, automated video production.
What is the best microphone for recording presentations?
A lapel mic or headset mic helps ensure consistent audio quality. Make sure to use a pop filter as well. For natural voice tone, position the mic close enough to pick up your voice clearly without being right on your mouth.
How do I look good on camera when recording?
Frame your shot at eye level or slightly above. Look into the camera when speaking. Wear professional, non-distracting clothing and minimal jewelry. Position yourself with flattering lighting. Keep a level head position.
What graphics should I include in a presentation video?
Relevant b-roll footage, images overlaying key points, simple text captions, lower third graphics, spotlight callouts, introSlide/outroSlide, transitions, and basic animations can all effectively supplement presentation slides.
What is the ideal length for a presentation video?
Aim for 5-10 minutes max for short educational or promotional videos. For webinars, trainings, or lectures, 20-40 minutes is common. Generally, shorter videos have higher engagement. Long presentations can be broken into segments.
Create stunning videos with Screen Story
Record your screen with audio and create stunning videos without editing skills. Screen Story applies the best design patterns to the video automatically.
.webp)

.webp)
