


Want to save important FaceTime conversations? Screen recording is an easy way to record a FaceTime conversation and capture both video and audio from FaceTime calls on your iPhone, iPad, or Mac. In this comprehensive guide, we'll explore different methods for how to screen record on FaceTime with sound using built-in tools as well as third party software like Screen Story.
Why Record Your FaceTime Calls?
Here are some great reasons for recording your FaceTime sessions:
- Save special memories and moments with loved ones
- Capture interviews or meetings for work projects
- Review details from class lectures or study groups
- Have records of important discussions or agreements
- Create videos and vlogs using call footage
- Troubleshoot technical issues by rewatching calls
While the FaceTime app itself doesn’t have a recording feature, various handy workarounds make it easy to screen record FaceTime with audio.
Can you screen record FaceTime calls for purposes like these? While the FaceTime app itself doesn't have a recording feature, various handy workarounds make it easy to screen record FaceTime with audio.
Recording FaceTime on iPhone and iPad
The built-in screen recording capability on iOS devices offers an easy way to capture FaceTime video. Here’s how to screen record FaceTime on an iPhone or iPad:
Activate Screen Recording in Control Center
First, enable screen recording in your iOS device's Control Center settings. Swipe down from the top right to access Control Center.
Start Recording and Make a FaceTime Call
Tap the screen record icon to start capturing your device's screen. Make or receive a FaceTime video call. The screen recorder will capture the video from the call.
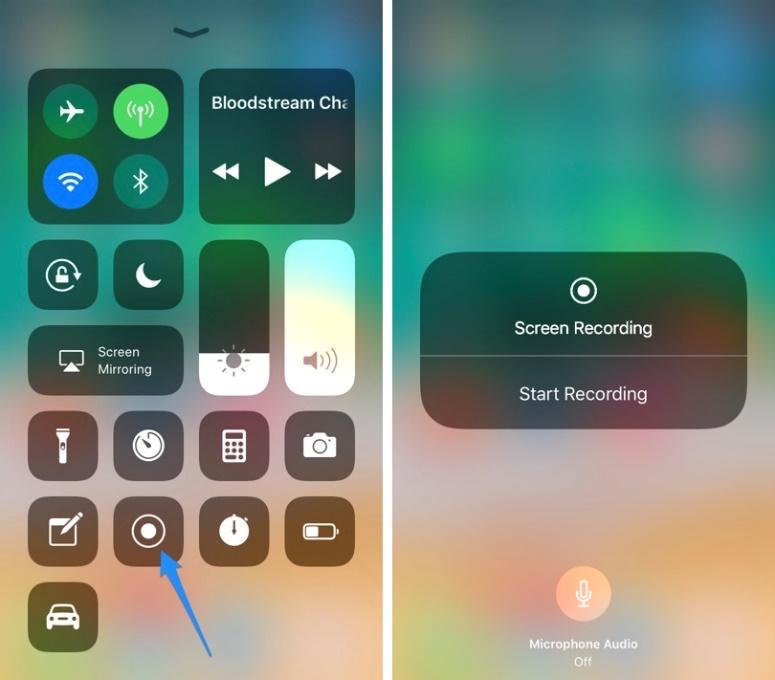
Stop Recording When Call Ends
To end the recording, open Control Center again and tap the screen record button. Your FaceTime video will be saved to the Photos app.
However, this method won't record audio. Here are some workarounds for how to record FaceTime with audio:
Use a Headphone Splitter as a Microphone
Plug a headphone splitter into your device's headphone jack. The input can function as an external mic to capture audio. Enable microphone access for screen recordings in Settings.
Try a Long Press on the Screen Record Icon
Before starting screen record, long press on the icon and check if a microphone option appears. If so, enable it to record FaceTime with audio.
Use Third Party Recording Apps
Apps like Screen Story enable high quality screen and audio recording. We'll explore Screen Story more later in this guide.
While limited, using your iPhone or iPad's built-in screen recording can provide a quick way to record a facetime conversation minus audio. Next, we'll look at how to screen record FaceTime with sound using your Mac.
Recording FaceTime on Mac
Mac computers offer more robust screen recording capabilities through QuickTime Player and macOS's built-in tool. Here's how to record a FaceTime conversation with sound on a Mac:
Record Through QuickTime Player
Open QuickTime Player and select File > New Screen Recording. Click the dropdown arrow next to the record button and select your microphone for audio. Start recording, make your FaceTime call, then stop the recording when finished.

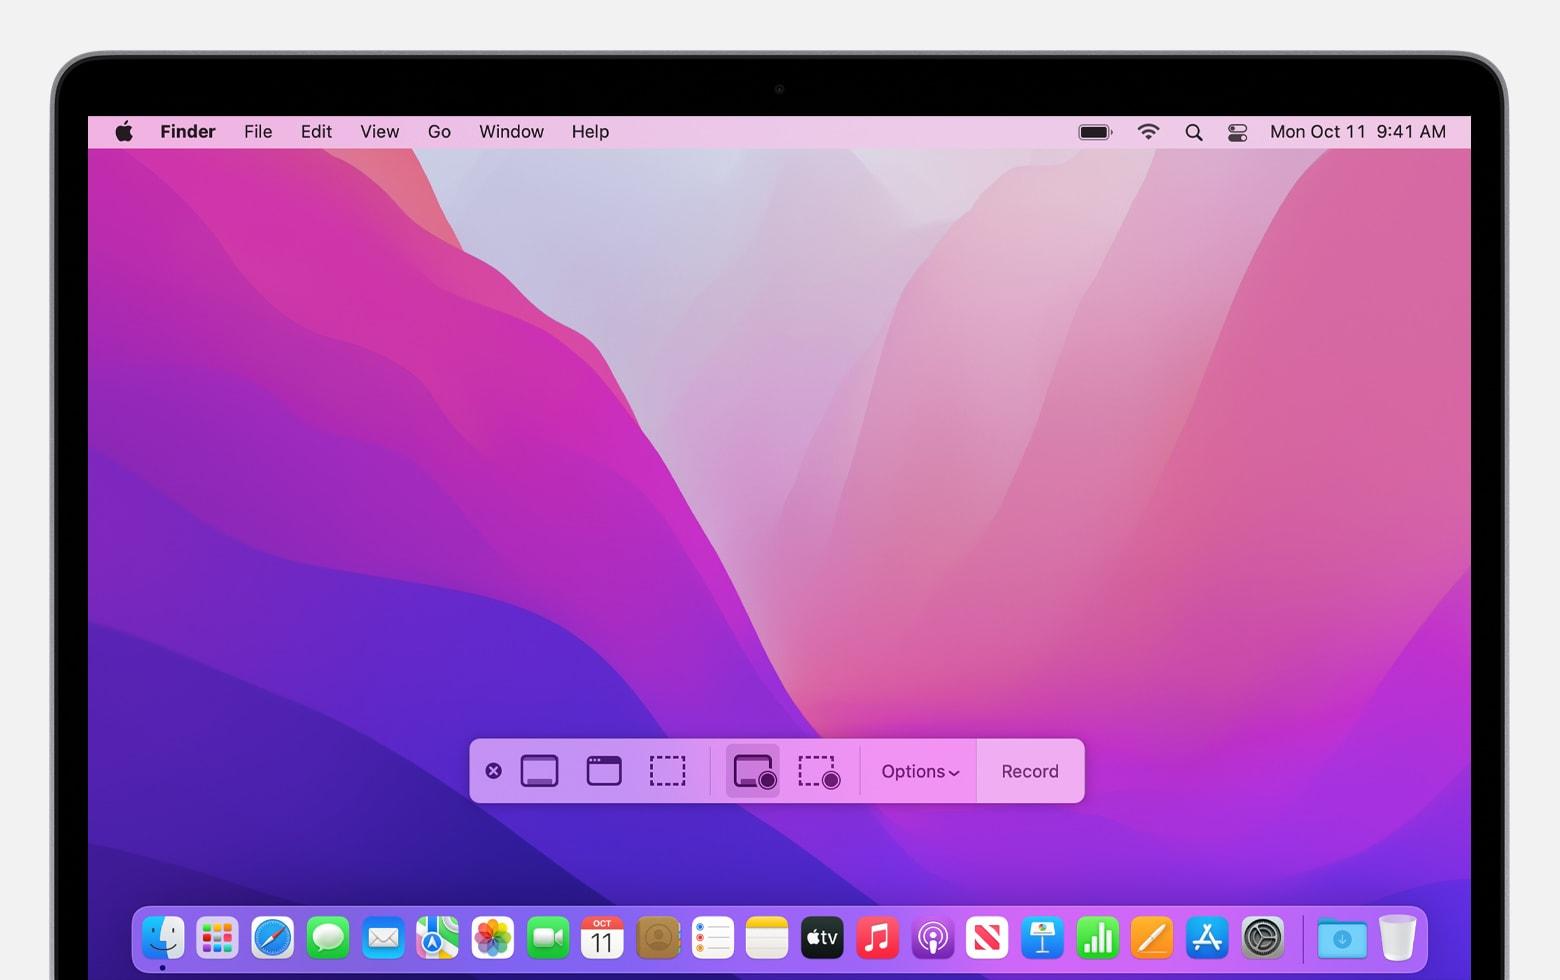
Use macOS Screen Recorder with Microphone
Alternatively, press Command-Shift-5 to open the macOS screen recorder. Select a microphone for audio, then click record and proceed with your FaceTime call. Your FaceTime video with audio will be saved.
The built-in macOS tools allow recording FaceTime with audio using your Mac's microphone. But can FaceTime calls be recorded with better quality? For even higher quality results, let's look at using Screen Story.
How to Screen Record on FaceTime with Screen Story
Here is a step-by-step guide to how to screen record FaceTime with sound using Screen Story on your Mac:
Download and Set Up Screen Story
Get Screen Story from the website and install on your Mac. Allow microphone access when launching the app.
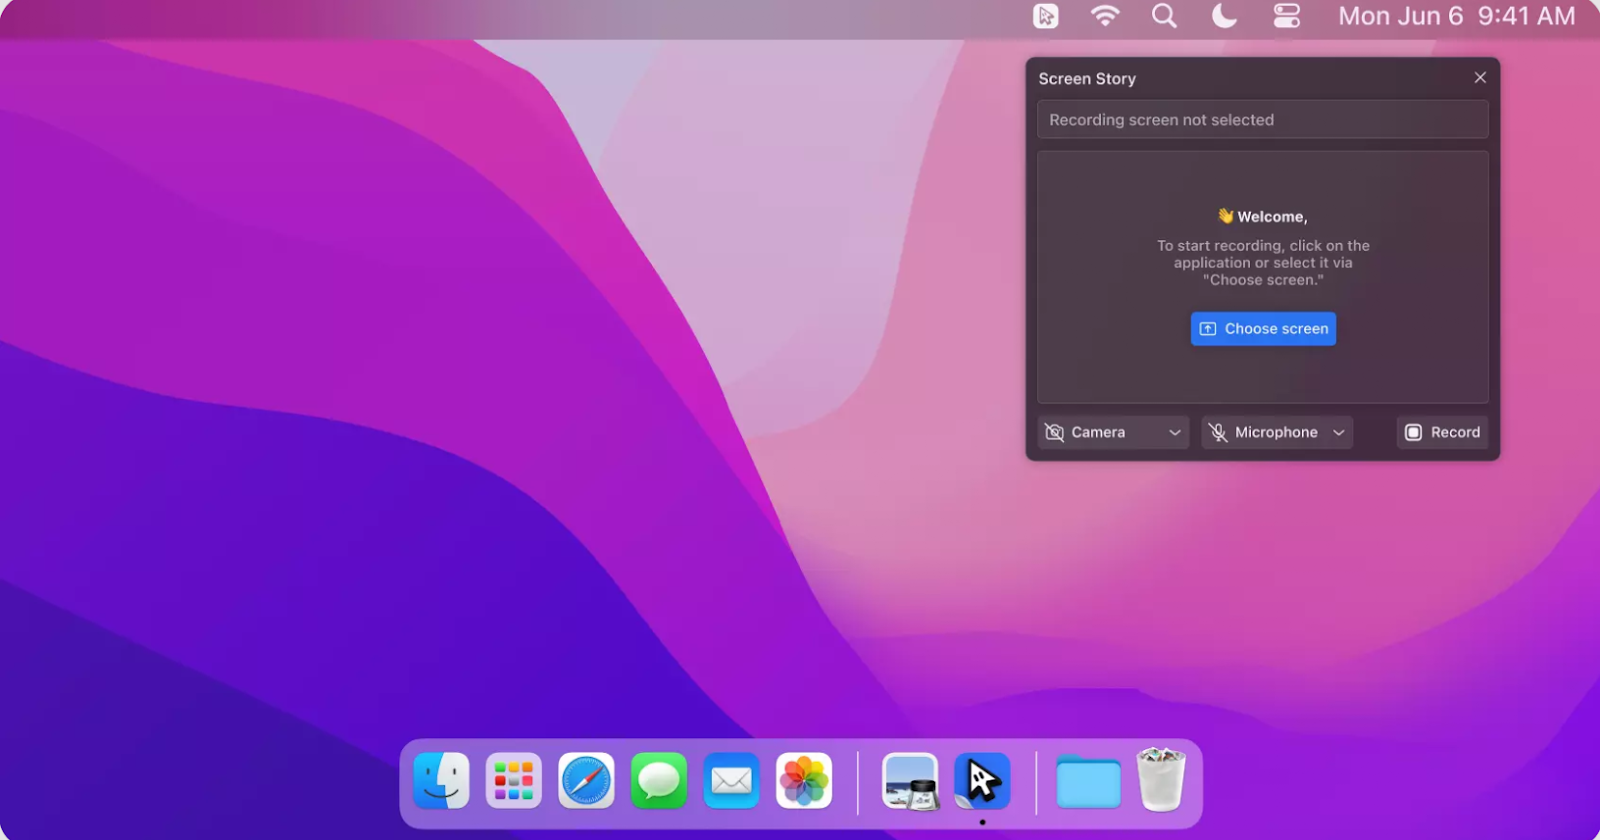
Configure Your Recording Layout
Select a Picture-in-Picture layout showing your reaction cam beside the FaceTime call video. Customize it to your preference.
Begin Recording
Click Record in Screen Story to start capturing your reaction video and audio. Minimize Screen Story and switch to the FaceTime app.
Conduct Your Call
Proceed with your FaceTime audio or video call as normal. Screen Story will record in the background.
End Recording When Call Finishes
Once your call ends, stop Screen Story's recording. Your separate reaction video and FaceTime call with audio will be captured.
{{blog-ad}}
Trim and Export the Video
Use Screen Story's editing tools to trim the beginning and end. Export in a format like MP4 to share or edit further.
With just a few clicks, Screen Story empowers you to reliably record a FaceTime conversation with pro-quality audio, customizing and exporting options.
If the available editing features aren’t sufficient for your needs, take advantage of third-party programs, e.g., Filmora for Mac.
Tips for Recording FaceTime Calls Like a Pro
Follow these expert tips when record a facetime conversation for perfectly captured videos every time:
Ask Permission First
Always get the consent of the other caller before recording a FaceTime call. Inform them when you start recording.
Check Your Camera and Audio
Make sure your camera framing and microphone settings are optimal before recording important calls.
Use Stable Camera Positioning
Mount your phone or webcam securely to avoid shaky footage. Use a tripod mount or stands.
Record Test Videos First
Test recording short FaceTime calls to check quality before recording long important sessions.
Customize Your Recording Layout
Take the time to arrange the Picture-in-Picture layout in an appealing way before recording.
Check Recordings Before Ending Calls
Verify that your FaceTime call video with audio was captured properly before ending important calls.
Backup Your Videos Afterwards
Once you end a call and stop recording, immediately backup your videos to avoid losing precious footage.
Following these best practices will ensure you artfully record FaceTime with audio and conserve the memories with professional quality.
Common FaceTime Recording Questions
Here are answers to some frequently asked questions about recording FaceTime calls:
Does FaceTime Notify When You Record a FaceTime Conversation?
No, there is no notification when you record a FaceTime call via screen recording methods. But always ask the other caller for permission first.
Can You Save Recorded FaceTime Calls to Your Camera Roll?
Yes, screen recordings of FaceTime on iPhone and iPad automatically save to your Photos app. Mac FaceTime recordings can be imported to Photos.
What Video Format Do FaceTime Screen Recordings Use?
iOS FaceTime recordings use MP4 video format. macOS and apps like Screen Story allow setting recording format, like MOV, MP4, GIF and more.
Does Recording FaceTime Use a Lot of Storage?
FaceTime recordings consume storage like any video. Use reasonable quality settings, or lower them if needing smaller files.
Can You Record FaceTime on Android?
While you can join FaceTime calls on Android, recording requires a Mac or iOS device due to Apple's restrictions. Use alternative video chat apps instead.
Preserve Cherished Conversations by Recording FaceTime
Being able to save special memories and critical discussions from FaceTime calls is priceless. Using the built-in screen recording capabilities on iPhone, iPad, and Mac makes capturing FaceTime video easy. For professional quality and control, third party tools like Screen Story provide robust recording, zooming, editing, and customization for crafting polished videos. Follow these guides and tips to easily record a facetime conversation with sound and preserve important moments with loved ones and colleagues.
Create stunning videos with Screen Story
Record your screen with audio and create stunning videos without editing skills. Screen Story applies the best design patterns to the video automatically.
.webp)

.webp)
