


Screen recording on a Mac with audio is a valuable skill, whether you're a content creator, educator, or simply want to capture moments from your screen. In this comprehensive guide, we will explore six of the best methods to screen record on Mac and get crystal-clear audio. From built-in tools to third-party software, we've got you covered.
How to Screen Record on Mac with Audio using Screenshot Toolbar
If you've ever asked, "Does Mac screen record capture audio?" the answer is yes.
Mac's Screenshot Toolbar is a handy built-in tool that can also be used for screen recording. If you're wondering how to screen record with sounds on Mac, here's how:
- Press Shift + Command + 5 to open the Screenshot Toolbar.
- Click the "Options" menu to select your audio input source.
- Click the record button to begin screen recording with audio.
- When finished, click the stop button, and your recording will be saved.
Screenshot Toolbar offers a simple and convenient way to capture your Mac's screen along with audio. It’s a great starting point if you're figuring out how to screen record on Mac and get audio with ease.
How to Screen Record on Mac with Audio using Screen Story
If you're looking for the easiest way to screen record on Mac and get audio, Screen Story is the answer. This user-friendly tool offers a seamless experience for capturing your screen and audio simultaneously. With just a few clicks, you can start recording tutorials, gameplay, presentations, or any other content.
Key Features:
- Intuitive interface for effortless recording.
- AutoZoom & AutoFollow clicks
- Smooth Cursor to make your video handcraft studio quality feel of the animation of the cursor automatically.
- Crystal-clear audio capture.
- Flexible export options including MP4 and GIF.
Screen Story takes the complexity out of screen recording, making it an ideal choice for beginners and professionals alike. Try it out and experience hassle-free screen recording on your Mac.
{{blog-ad}}
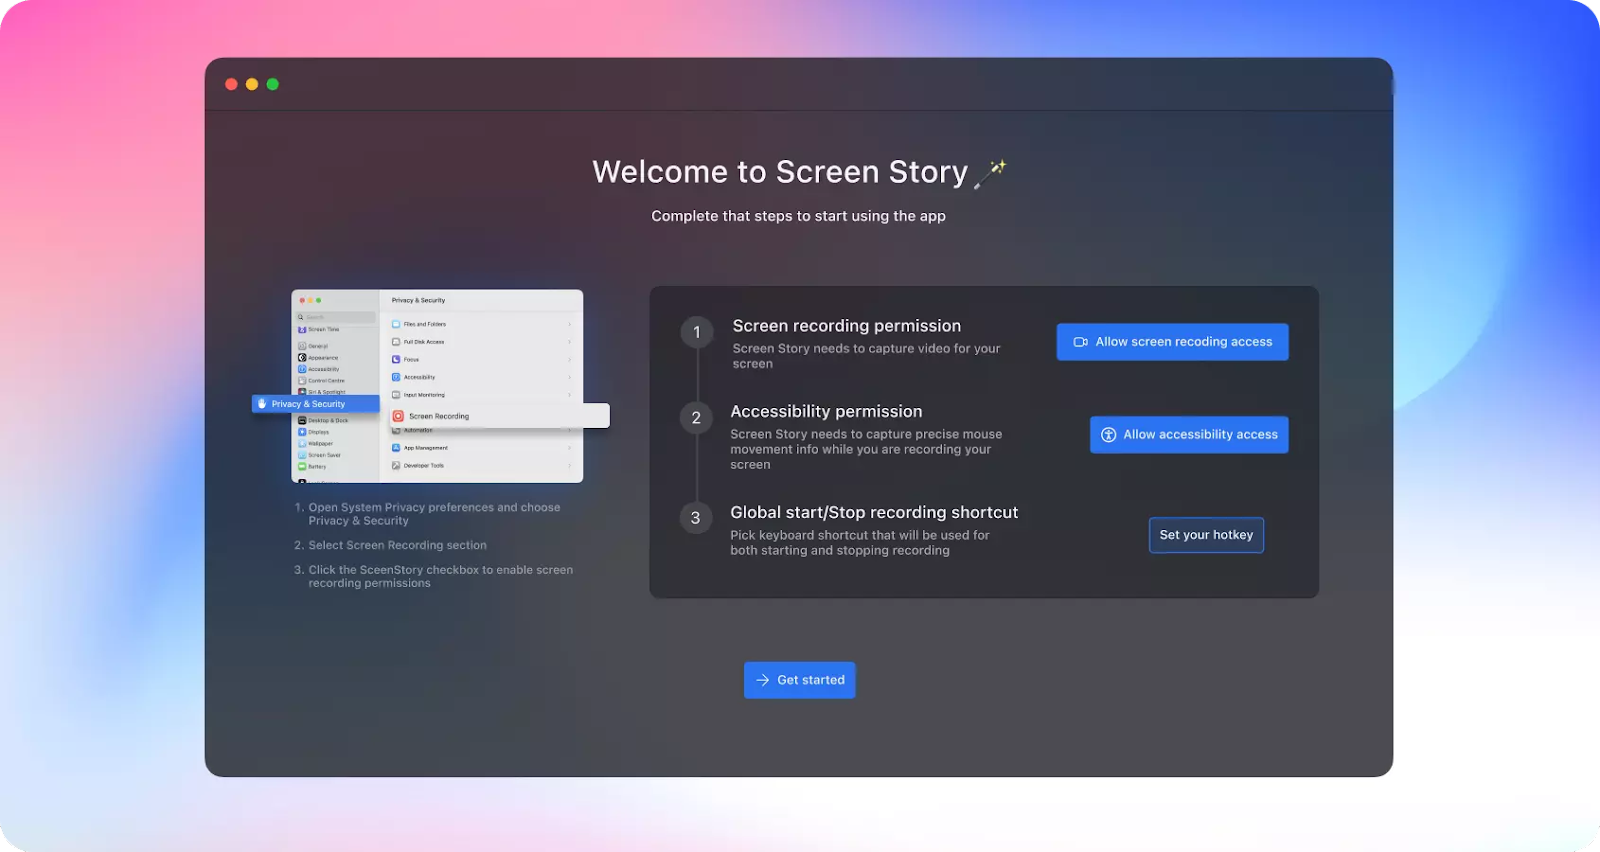
Step 1: Launch the Screen Story App
Begin by opening the Screen Story application on your Mac. Make sure to grant the necessary Accessibility and Screen Recording permissions.
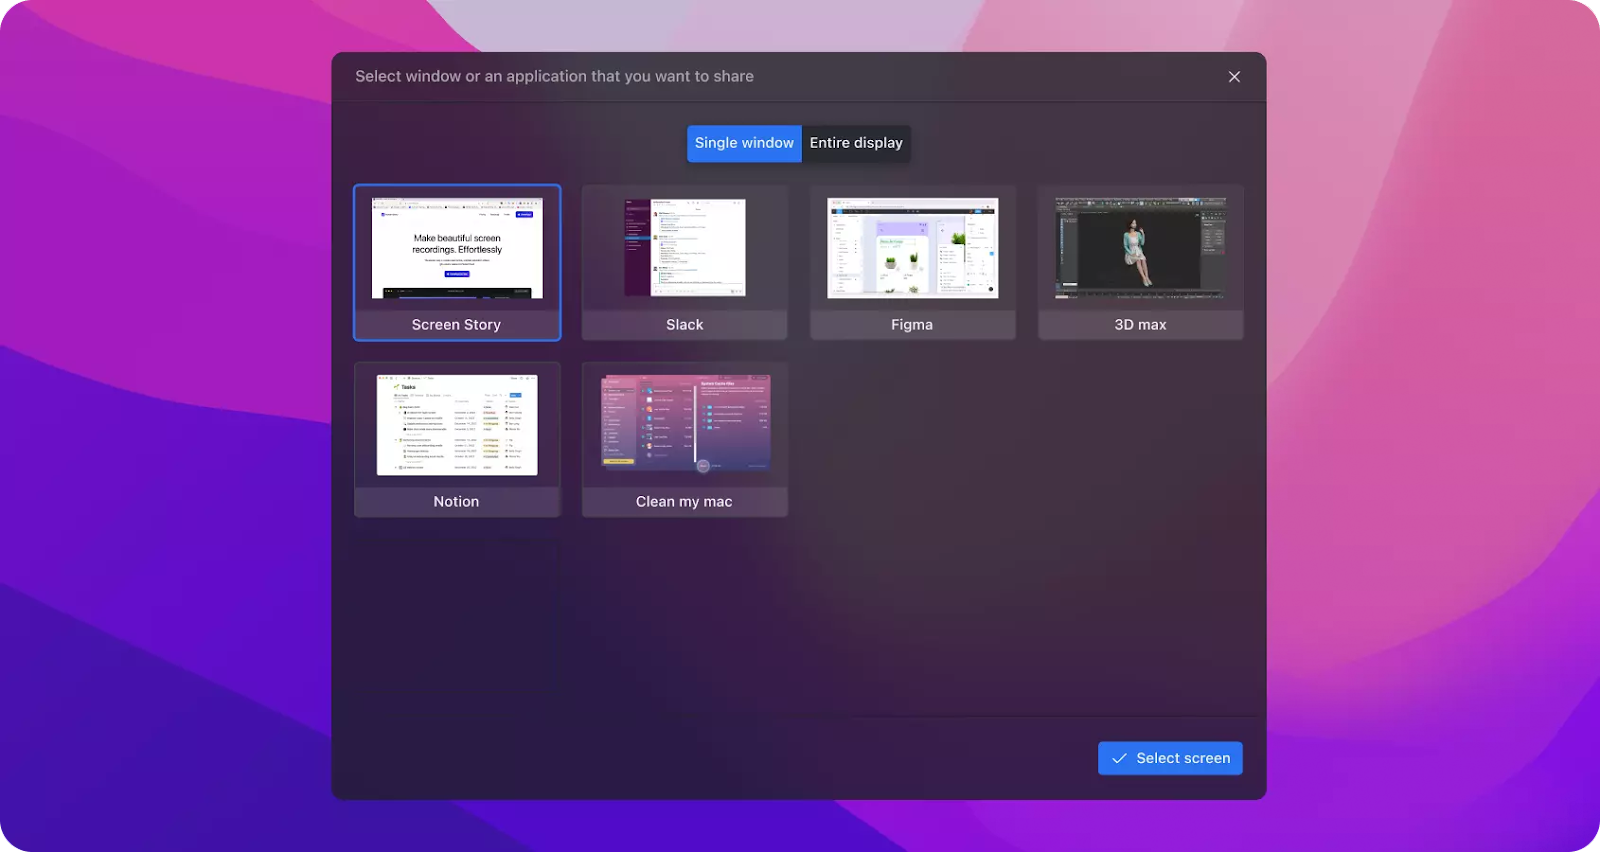
Step 2: Select Your Recording Area
Click the "Choose Screen" button to pick the specific window or application you wish to capture. Whether you want to record your entire screen or a specific section, the choice is yours.
Find the window that you want to record and press the button Select screen
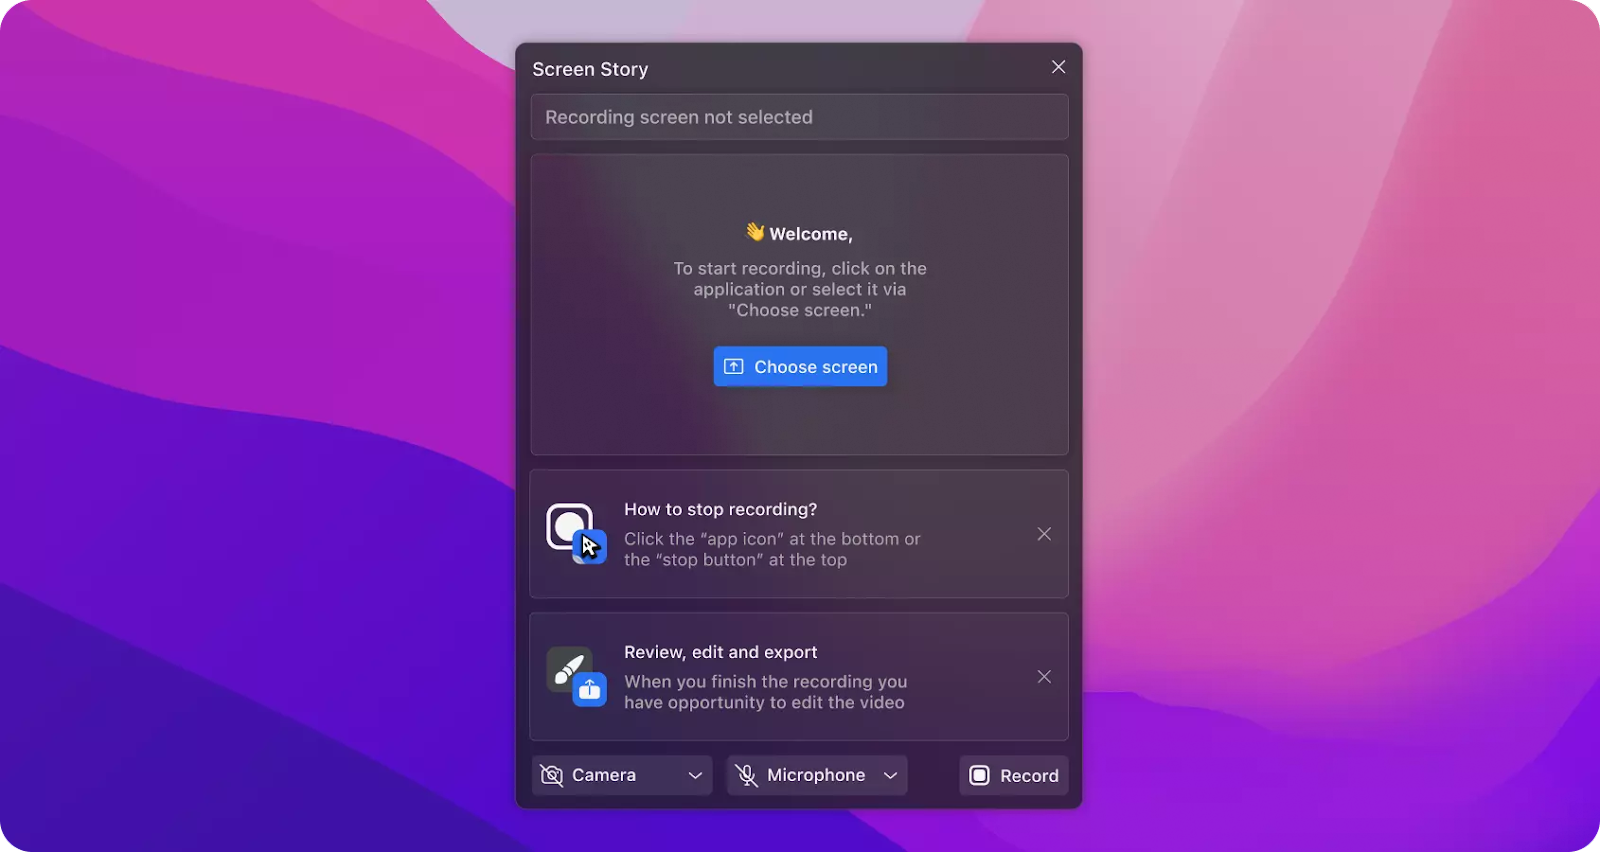
Step 3: Record Your Video
Once you've chosen your recording area, choose camera and microphone. Then initiate the recording by clicking the "Record" button within the Screen Story app. Screen Story will faithfully capture everything within the selected recording area. To stop the recording click the “app icon” at the bottom (Dock) or the red button at the top (Menu bar).

Step 4: Optional Video Editing
Screen Story seamlessly generates zooms in response to the user's mouse clicks during recording. If needed, create custom zooms or utilize Screen Story's basic video editing tools to trim, enhance, and refine your recording to your satisfaction. After any necessary editing, save your video in your preferred format, be it MP4, GIF, 60 FPS, or 4K.

Here you can find a comprehensive guide - https://www.screenstory.io/mac-screen-recorder-guide
So, can I screen record on my Mac with sound? Absolutely, with Screen Story!
How to Screen Record on Mac with Audio using QuickTime Player
QuickTime Player, a built-in Mac application, is a versatile tool for screen recording with audio. Follow these steps to get started:
- Launch QuickTime Player.
- Click "File" and select "New Movie Recording."
- Click the arrow next to the record button and choose your audio input source.
- Click the record button to start capturing your screen and audio.
- When finished, click the stop button and save your recording.
QuickTime Player is a straightforward option for Mac users who prefer a native solution.
How to Screen Record on Mac with Audio using Capto
Capto is a comprehensive screen recording and video editing software designed for Mac users. Here's how to use it:
- Download and Install Capto: Download Capto from the App Store and install it on your Mac.
- Open Capto: Launch Capto and access the main interface.
- Select Recording Area: Click the "Record" button and choose your recording area. You can capture the full screen or a specific region.
- Audio Settings: In the recording settings, select your preferred audio input source, whether it's your microphone or system audio.
- Begin Recording: Click the "Record" button to start recording your screen and audio.
- Edit and Save: After recording, Capto provides editing tools to enhance your video. Once you're satisfied, save your recording.
How to Screen Record on Mac with Audio using OBS Studio
OBS Studio is an open-source powerhouse for screen recording and live streaming. It supports multiple sources, including screen capture, webcam, audio input, and images. Users can create scenes with various sources and apply transitions for seamless switching. It's highly customizable with filters, plugins, and studio mode. Advanced users can benefit from scripting and integration options.
Pros:
- Unparalleled customization with scenes, sources, filters, and plugins.
- Designed for both recording and streaming needs.
- Being open-source, it's constantly improved by the community.
Cons:
- The extensive features can be overwhelming for beginners.
- It takes time to understand and set up all the options.
OBS Studio is the go-to choice for those who seek powerful customization and streaming features. However, it might not be the best choice for beginners due to its learning curve.
How to Screen Record on Mac using Audio Movavi Screen Recorder
Movavi Screen Recorder offers easy and efficient screen capturing along with basic editing features. It enables users to record webinars, tutorials, and more. The built-in editor allows trimming, adding captions, and basic effects to the recorded footage. The software also supports scheduled recordings.
Pros:
- Simple and intuitive interface for quick recordings.
- Basic editing tools for enhancing recorded content.
- Scheduled Recording: Useful for capturing content at specific times.
Cons:
- Limited advanced editing and customization options.
- Not as feature-rich as some other options.
Movavi Screen Recorder is a practical choice for straightforward screen recordings and basic edits, suitable for those not needing extensive editing features.
Each of these six screen recording methods offers distinct features catering to different user needs. From the simplicity of Screen Story to the built-in options like QuickTime Player, Screenshot Toolbar, to the versatility of OBS Studio and the convenience of Movavi Screen Recorder, you have a spectrum of choices. Consider your requirements, budget, and level of expertise to select the method that aligns best with your needs.
Create stunning videos with Screen Story
Record your screen with audio and create stunning videos without editing skills. Screen Story applies the best design patterns to the video automatically.
.webp)

.webp)
